


A assinatura da TeachPlus só me trouxe benefícios dentro do meu negócio. Ao oferecer meu serviço e dizer que os alunos não precisam pagar pelo material faz todo o diferencial. Sem contar na praticidade das aulas presenciais com os tablets que eu forneço. Já alivia o peso de carregar ou esquecer o livro físico em casa.

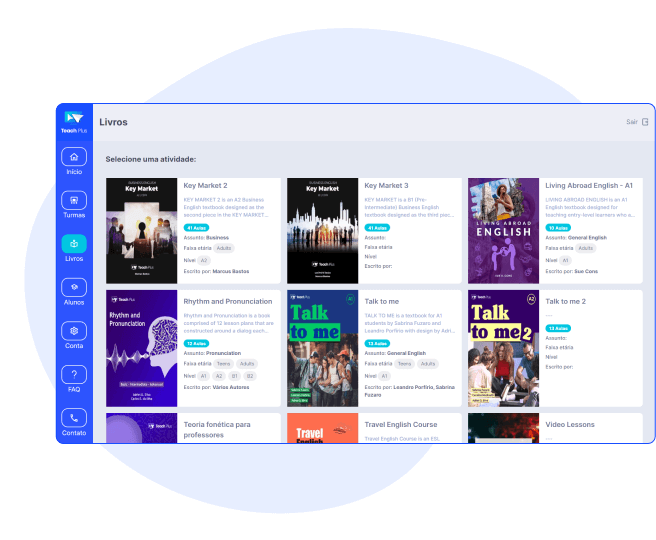
Eu adoro os produtos do Vini, e com certeza a experiência com a TeachPlus tem sido maravilhosa, e adquiri a plataforma por ter materiais voltados para os níveis A1 e A2 e buscava algo moderno e atualizado para o meu maior público. Tenho utilizado muito as lições de Conversação e a de Business com os meus alunos, as aulas são atualizadas e muito bem desenhadas. Recomendo a plataforma.

A TeachPlus é uma ferramenta fantástica. Estou usando já há algum tempo e os meus alunos adoram o material. Os livros são elaborados de maneira didática e os tópicos de cada lição se encaixam perfeitamente na realidade dos alunos.

Uso a plataforma desde o início, e amo por vários motivos:
1. Poder usar os materiais de colegas muito queridos e que são referência para mim.
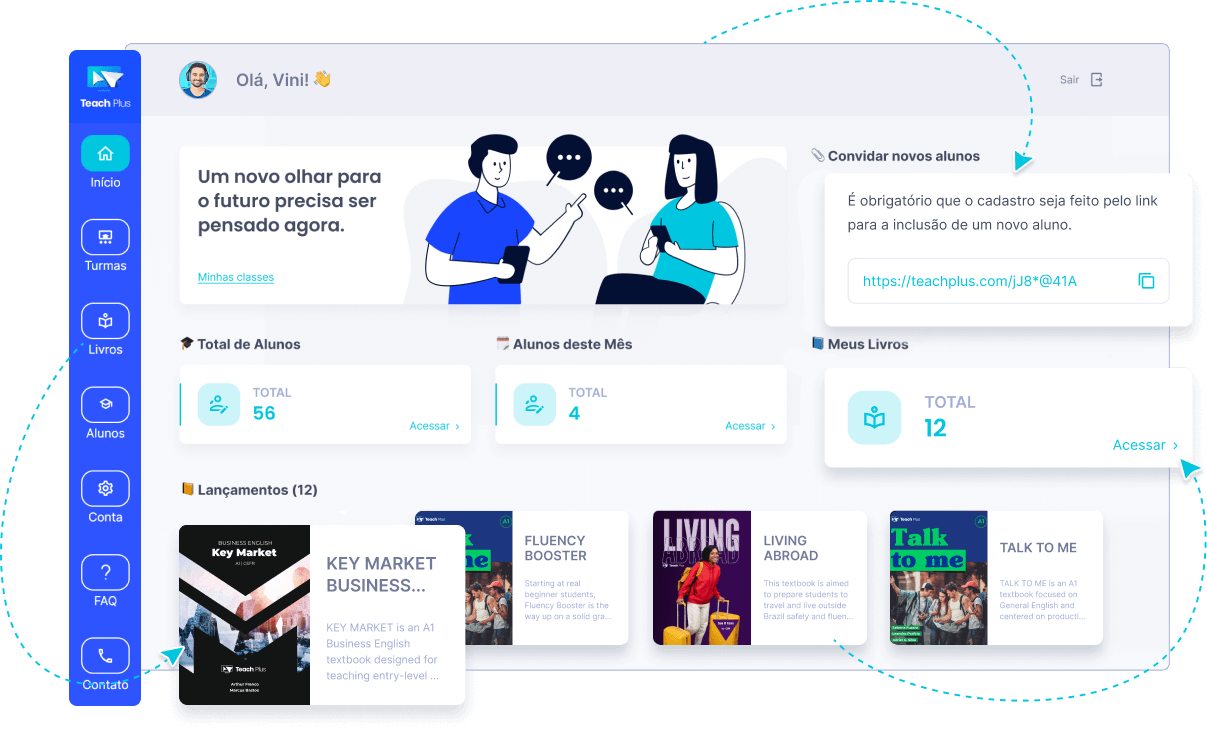
2. Os alunos têm o material didático pronto para uso com qualquer dispositivo que tenha acesso à internet.
3. A plataforma é bastante leve, então funciona tranquilamente mesmo para quem não tem uma conexão muito rápida.
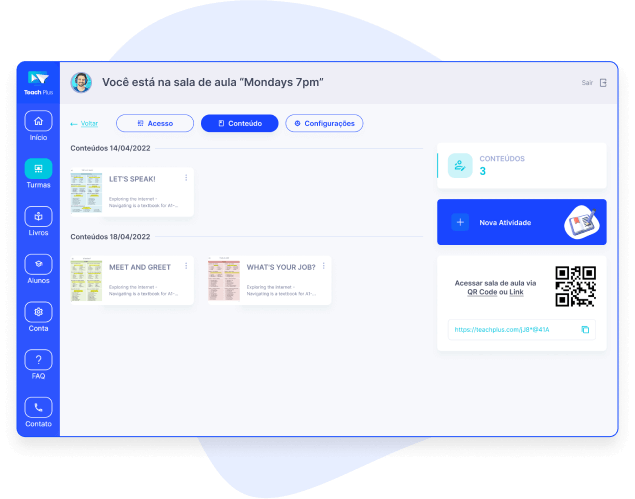
4. O material é interativo e podemos acompanhar em tempo real as atividades que os alunos fazem, sem a necessidade de compartilhar a tela.
Mal posso esperar pelas novas funcionalidades. Vida longa à TeachPlus!
1. Poder usar os materiais de colegas muito queridos e que são referência para mim.
2. Os alunos têm o material didático pronto para uso com qualquer dispositivo que tenha acesso à internet.
3. A plataforma é bastante leve, então funciona tranquilamente mesmo para quem não tem uma conexão muito rápida.
4. O material é interativo e podemos acompanhar em tempo real as atividades que os alunos fazem, sem a necessidade de compartilhar a tela.
Mal posso esperar pelas novas funcionalidades. Vida longa à TeachPlus!

A assinatura da TeachPlus só me trouxe benefícios dentro do meu negócio. Ao oferecer meu serviço e dizer que os alunos não precisam pagar pelo material faz todo o diferencial. Sem contar na praticidade das aulas presenciais com os tablets que eu forneço. Já alivia o peso de carregar ou esquecer o livro físico em casa.
Eu adoro os produtos do Vini, e com certeza a experiência com a TeachPlus tem sido maravilhosa, e adquiri a plataforma por ter materiais voltados para os níveis A1 e A2 e buscava algo moderno e atualizado para o meu maior público. Tenho utilizado muito as lições de Conversação e a de Business com os meus alunos, as aulas são atualizadas e muito bem desenhadas. Recomendo a plataforma.